
Author: Matt Burton, Charlotte Davies / Editor: Liz Herrieven / Reviewer: Charlotte Davies / Codes: / Published: 24/08/2020 / Reviewed: 16/10/2025
Special thanks to the LGT team for pictures!
Most patients arrive with c-spine immobilisation, now called “restriction of c-spine movement” or ROCSM, in situ. If they haven’t, and they need it, there’s a few steps to take.
There’s no meticulously clear consensus guideline on this process. ATLS provides an outline and basics and PHTLS provides further overview. Many pedantic differences have been suggested and identified – but the core principles will remain the same. We hope. There’s a consensus guideline on c-spine in elderly patients in April 2022’s EMJ, together with some thoughts on screening tools.
Apply Manual Inline Stabilisation (MILS)
1. Ask the patient to keep their neck still whilst you give them some pain relief – it’s easier for them to take it now, before they’re lying flat.
2. Ask the patient to lie down on a handy trolley, on a trauma mattress if you have one available.
Back in the dark ages we used to be a lot more hands on in helping the patient to lie down, performing theatrical wizardry like the “standing takedown” but now we realise less is more – and the patient moves their neck less if they’re left to their own devices.
3. “Manually stabilise” the neck by firmly placing your hands either side of their head, making sure you don’t cover up their ears. You’ll want the trolley lifted up so that you don’t get a bad back.


The point of this is two fold: firstly to stop the patient moving their neck accidentally, and secondly to remind everyone that the c-spine has not been cleared yet! Some people clamp their hands firmly on the patient’s shoulders, some rest on the head – as long as it stops the head moving, it’s OK!
4. Ask for equipment – a helper, collars, blocks and tape.
5. Ask your helper to remove earrings and necklaces (and put them in a blood bag, then tape them to the patient’s notes) – they will affect the quality of any radiography. It’s also worth moving any long hair from around the neck and loosening any shirt collars, if your patient is still dressed.
Consider Gold Standard Immobilisation
We say consider, as “gold standard” isn’t without risk if used inappropriately!
6. In an adult, consider applying a collar, and then get the collar sized. APLS does not recommend collars in children. Most departments will use a rigid c-spine collar at this point. Some will go straight to a formal collar such as the miami J collar and if your department does this you will be formally trained and assessed. Miami Js are great, and cause less harm, but they’re expensive and harder to size properly.
The rigid c-spine collars are either adjustable or fixed size.
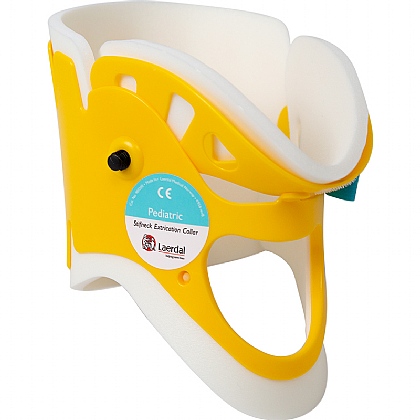
Fixed size collars come in a set (image from Laerdal). They range from “no-neck”, through to “long neck”. The black peg to the edge of the yellow plastic is your measuring point.

Adjustable collars are becoming much more common as … they’re adjustable! They are sized from the red window to the bottom of the hard plastic.
Sizing a collar often causes much anguish. The point of the collar is to reduce the amount of head “nodding”. So, if you think about it, you need the collar big enough it stops that movement, but not so big it causes adjustment of the spinal contours or pressure sores. The only bit of the collar that functions and works is the rigid plastic – the white foam is just padding. So that means the plastic bit needs to be measured against the moving bit of the neck.
So, which bit of the neck moves? Well, the top of the shoulders (lets call it the trapezius insertion) to bottom of the chin seems about right. How many of your fingers can you fit in that space? Use a collar that allows you to fit the same number of fingers between the sizing post (or red spot) and the bottom of the hard plastic (top tip – everyone’s fingers are different sizes, so don’t measure with your own hand and then ask someone else to fetch a 3 finger collar….). When measuring have “thumb to bum” to make sure your hands are in the right plane – and of course…. someone should be applying manual inline immobilisation whilst you measure.


Can’t remember where to size? Well, if you look closely enough at the collar, it’s all written on it – usually at the back.

7. Roll the collar to fit & fold the velcro

Collars are stored flat – as below in the picture. When they’re applied, they’ll be round. Give them a head start and a little roll before you apply the collar – it makes it work much more easily.
If you then fold the velcro flat, it stops it sticking to hair and pulling the patient’s hair out – a minor harm…but nonetheless, they’ll still thank you for it!
8. Apply the collar
One person must maintain manual inline stabilisation.
The helper should push the collar down into the bed and then under the patient’s neck, from right to left, until the velcro pops out (pushing it through left to right will put it on upside down).
Then, swing the front piece down and under the chin, so the chin rests nicely in the support (there’s usually a dot or spot in the middle of the chin rest – this should be in the middle of the chin).
Attach the velcro.
Check the fit.
There’s a video of this here – but ask someone to show you.
9. Apply the blocks
Maintain manual inline stabilisation. The helper should place the blocks either side of the immobiliser’s hand, flat side to the patient’s head. Ideally, the holes should be over the ears, so the patient can still hear!

10. Apply the tape. The tape is to help reduce neck rotation (shaking of the head), as well as attaching the blocks to the bed. One strip over the forehead, one across the chin. Stick the ends down to something immobile, like the trolley base, NOT the sheets or trolley rails! It might seem mean – but you should tape the patient’s head! Putting gauze under the tape or pinching it together to avoid sticking to skin just stops it doing its job.

Collars, blocks and tape – gold standard! Blocks and tape – acceptable alternative. Just hard collar = NEVER acceptable.
When not to immobilise the neck
The biggest reason not to immobilise the neck is when it’s not needed!!! Be sensible, but if you’re not sure – ask! If the patient has been stabbed in their abdomen… they may be a trauma, but why do they need their c-spine immobilising? If a patient’s fallen down the stairs and broken their leg, they may have a fractured neck of femur, but their c-spine will still need considering. If you’ve got the cognitive bandwidth, apply the Canadian c-spine rules (don’t just go on presence of midline tenderness – most people have this. See April 22 EMJ).
C-spine immobilisation is not a benign procedure. It can cause airway problems. It can cause raised intercranial pressure. It can cause pressure sores. It can also exacerbate c-spine problems if you try and straighten out a longstanding neck deformity – especially in a kyphotic elderly patient. Think before you move! Rugby players with really bulky shoulder muscles are unlikely to fit a collar – don’t try and force one on.
Drunk people are often difficult to immobilise. Popping them in a collar makes them agitated and wriggly. Discuss with a senior – it’s probably safer to take the collar off and try with just blocks and tape. If they don’t tolerate that, your senior needs to think whether safe sedation for immobilisation is needed, or if no immobilisation is needed – it’s a difficult call as the patient might be fine and drunk, or they might be drunk with a hypoxic brain injury.
Remember, the c-spine is not “cleared”, just because it is not immobilised.
In a UK first, how we manage spinal injuries is changing thanks to CCP Alan Cowleys research. We will be using approaches such as encouraging patients not to move their neck or head blocks to immobilise the neck instead of semi-ridged neck collars.https://t.co/7eXQz4Ou2J pic.twitter.com/3KzKRssIP4
— South East Coast Ambulance (@SECAmbulance) July 15, 2020
After the c-spine
We often think of the log roll hand in hand with the c-spine. The log roll is simply when we move the patient “like a log”, maintaining their spinal stabilisation. Why would we want to move them? Well – good question! Typically, we may roll patients to look at their back, and see if we’ve missed any significant injuries. Nowadays, most patients are either conscious enough to tell you their back hurts, or poorly enough they’re getting a “CT traumagram” regardless. “But what about missed stab wounds” I hear you cry! Well – your patient should be undressed and you can slide your hands underneath pretty much to the spine anyway – so, there’s not a lot you’ll miss. Trust the advice of your experienced team leader – if they want to roll… roll.
The biggest reason, practically, for rolling an immobilised patient is because they’re queasy and want to vomit. Clearly if they vomit lying flat on their back, that’s not going to end well. So, we roll them and hope we catch the vomit.
How do we log roll?
Practice a log roll before you need to do it. The most important person is the one who has the head. They carry the weight of the head, command of the team and responsibility for c-spine alignment. They need at least four more helpers, making five in the team.
Person One: Head end. Team leader.
Person Two: Tallest person. Puts one hand on the patient’s shoulder. One hand just above their hip.
Person Three: Middle height. Puts one hand on the patient’s hip, and one hand under their inner thigh.
Person Four: Smallest person. Puts one hand under the knee and one hand under the ankle.
Person Five: Holds the vomit bowl / examines the back.
The team leader must issue clear and concise instructions. Saying “one, two, three, roll” leads to confusion – do you turn on three, or roll? “Ready, brace roll” is often simpler. Specify whether you want to turn to 90 degrees, or 45. Clearly 90 is needed for a vomiting patient but minimal movement is preferred for a pelvic injury. Rolling to 45 degrees to put a wedge in for a pregnant trauma victim is probably wise.
Hands – three over, three under is preferred. Do you cross over or not? ATLS suggests crossing hands – but it’s probably not top of your worry list.


Which way do you roll? If the patient has a left sided haemothorax suspected, roll to the left – otherwise the weight of the haemothorax can kink the vessels and compromise the heart. A left sided broken femur – probably easier to roll onto the left than to use the left as a lever. Suspected pelvis fracture? Consider applying a binder first.
So, in summary:
Manual inline stabilisation whilst you’re thinking and preparing.
Consider gold standard restriction of spinal movement (immobilisation) – collars, blocks and tape.
Once you’ve restricted c-spine movement, be prepared to do a log roll.
Further Reading
- RCEMLearning Induction – The C-spine
- RCEMLearning Reference – Cervical Spine Injury
- National Institute for Health and Care Excellence (NICE). Spinal injury: assessment and initial management. [NG41] NICE, 2016.